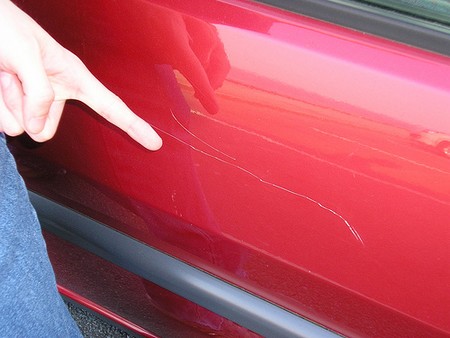
The repair described in this article assumes the presence of deep scratches and numerous chips spread over the paint of a body pane. It also assumes the unavailability of a compressor and paint gun. The purpose of making the following repairs yourself, therefore, is to reduce costs by doing preparatory work before turning the car over to an auto body paint shop for repainting.

You will need these supplies: wax-removing solvent; a sanding block; a tack cloth; 80-, 240-, and 400-grit sandpaper; glazing putty; spray cans of zinc chromate and finishing primer; and a rubber contour squeegee.
Here is what to do:
- After washing and drying the body panel, clean it with wax-removing solvent.
- Use 80-grit sandpaper attached to the sanding block over the damaged area. Keep the sanding block flat against the surface and apply moderate pressure. Move the sandpaper in a back-and-forth motion. Do this until you produce bare metal. Then, wipe the area clean.
- Using a piece of 240-grit sandpaper attached to the sanding block, sand the area again to remove scratches in the metal that were made by the 80-grit sandpaper.
- The next sanding step is done to get the area as smooth as possible. Use 400-grit sandpaper attached to the sanding block. Keep the sandpaper wet.
- After sanding, wash the area with plain water and wipe it with the tack cloth, which will remove fine particles.
- Let the surface dry completely.
- Cover moldings and adjacent panels with newspaper held in place with masking tape. This is done to guard against primer overspray.
- Hold the spray can of zinc chromate primer parallel to the area, at a distance of 10 to 12 inches. Moving the can back and forth, spray the primer onto the surface until all bare metal is covered.
- Let the primer dry.

- Scoop a glob of glazing putty onto the edges of a rubber contour squeegee and spread it onto the surface. Use moderate pressure so that the putty will stick. Move the squeegee in one direction only.
- After the putty dries, sand it with 240-grit sandpaper attached to the sanding block. Sand until the putty is level with the surrounding surface. Run your hand over the area to make certain no high spots remain. Then, inspect the putty for the presence of pits or rough areas and to determine whether you inadvertently sanded off too much, leaving a low spot. If necessary, apply another layer of glazing putty and repeat the sanding operation.
- Attach 800-grit sandpaper to the sanding block, saturate the paper with water, and sand the repaired area of the panel until the surface is as smooth as possible. Dip the sandpaper into water frequently.
- When you are satisfied with the smoothness of the panel, wash it and then wipe it with the tack cloth. Let the surface dry completely.
- Apply the finish primer, using the same technique described for application of the zinc chromate primer. The panel is now ready for painting.


